Azure, Azure, and more Azure - Key Vault | Basic Workflow and Links
Key Vault
Self-study links
Set and retrieve a secret from Azure Key Vault using Azure CLI
Use Key Vault references for App Service and Azure Functions
Notes
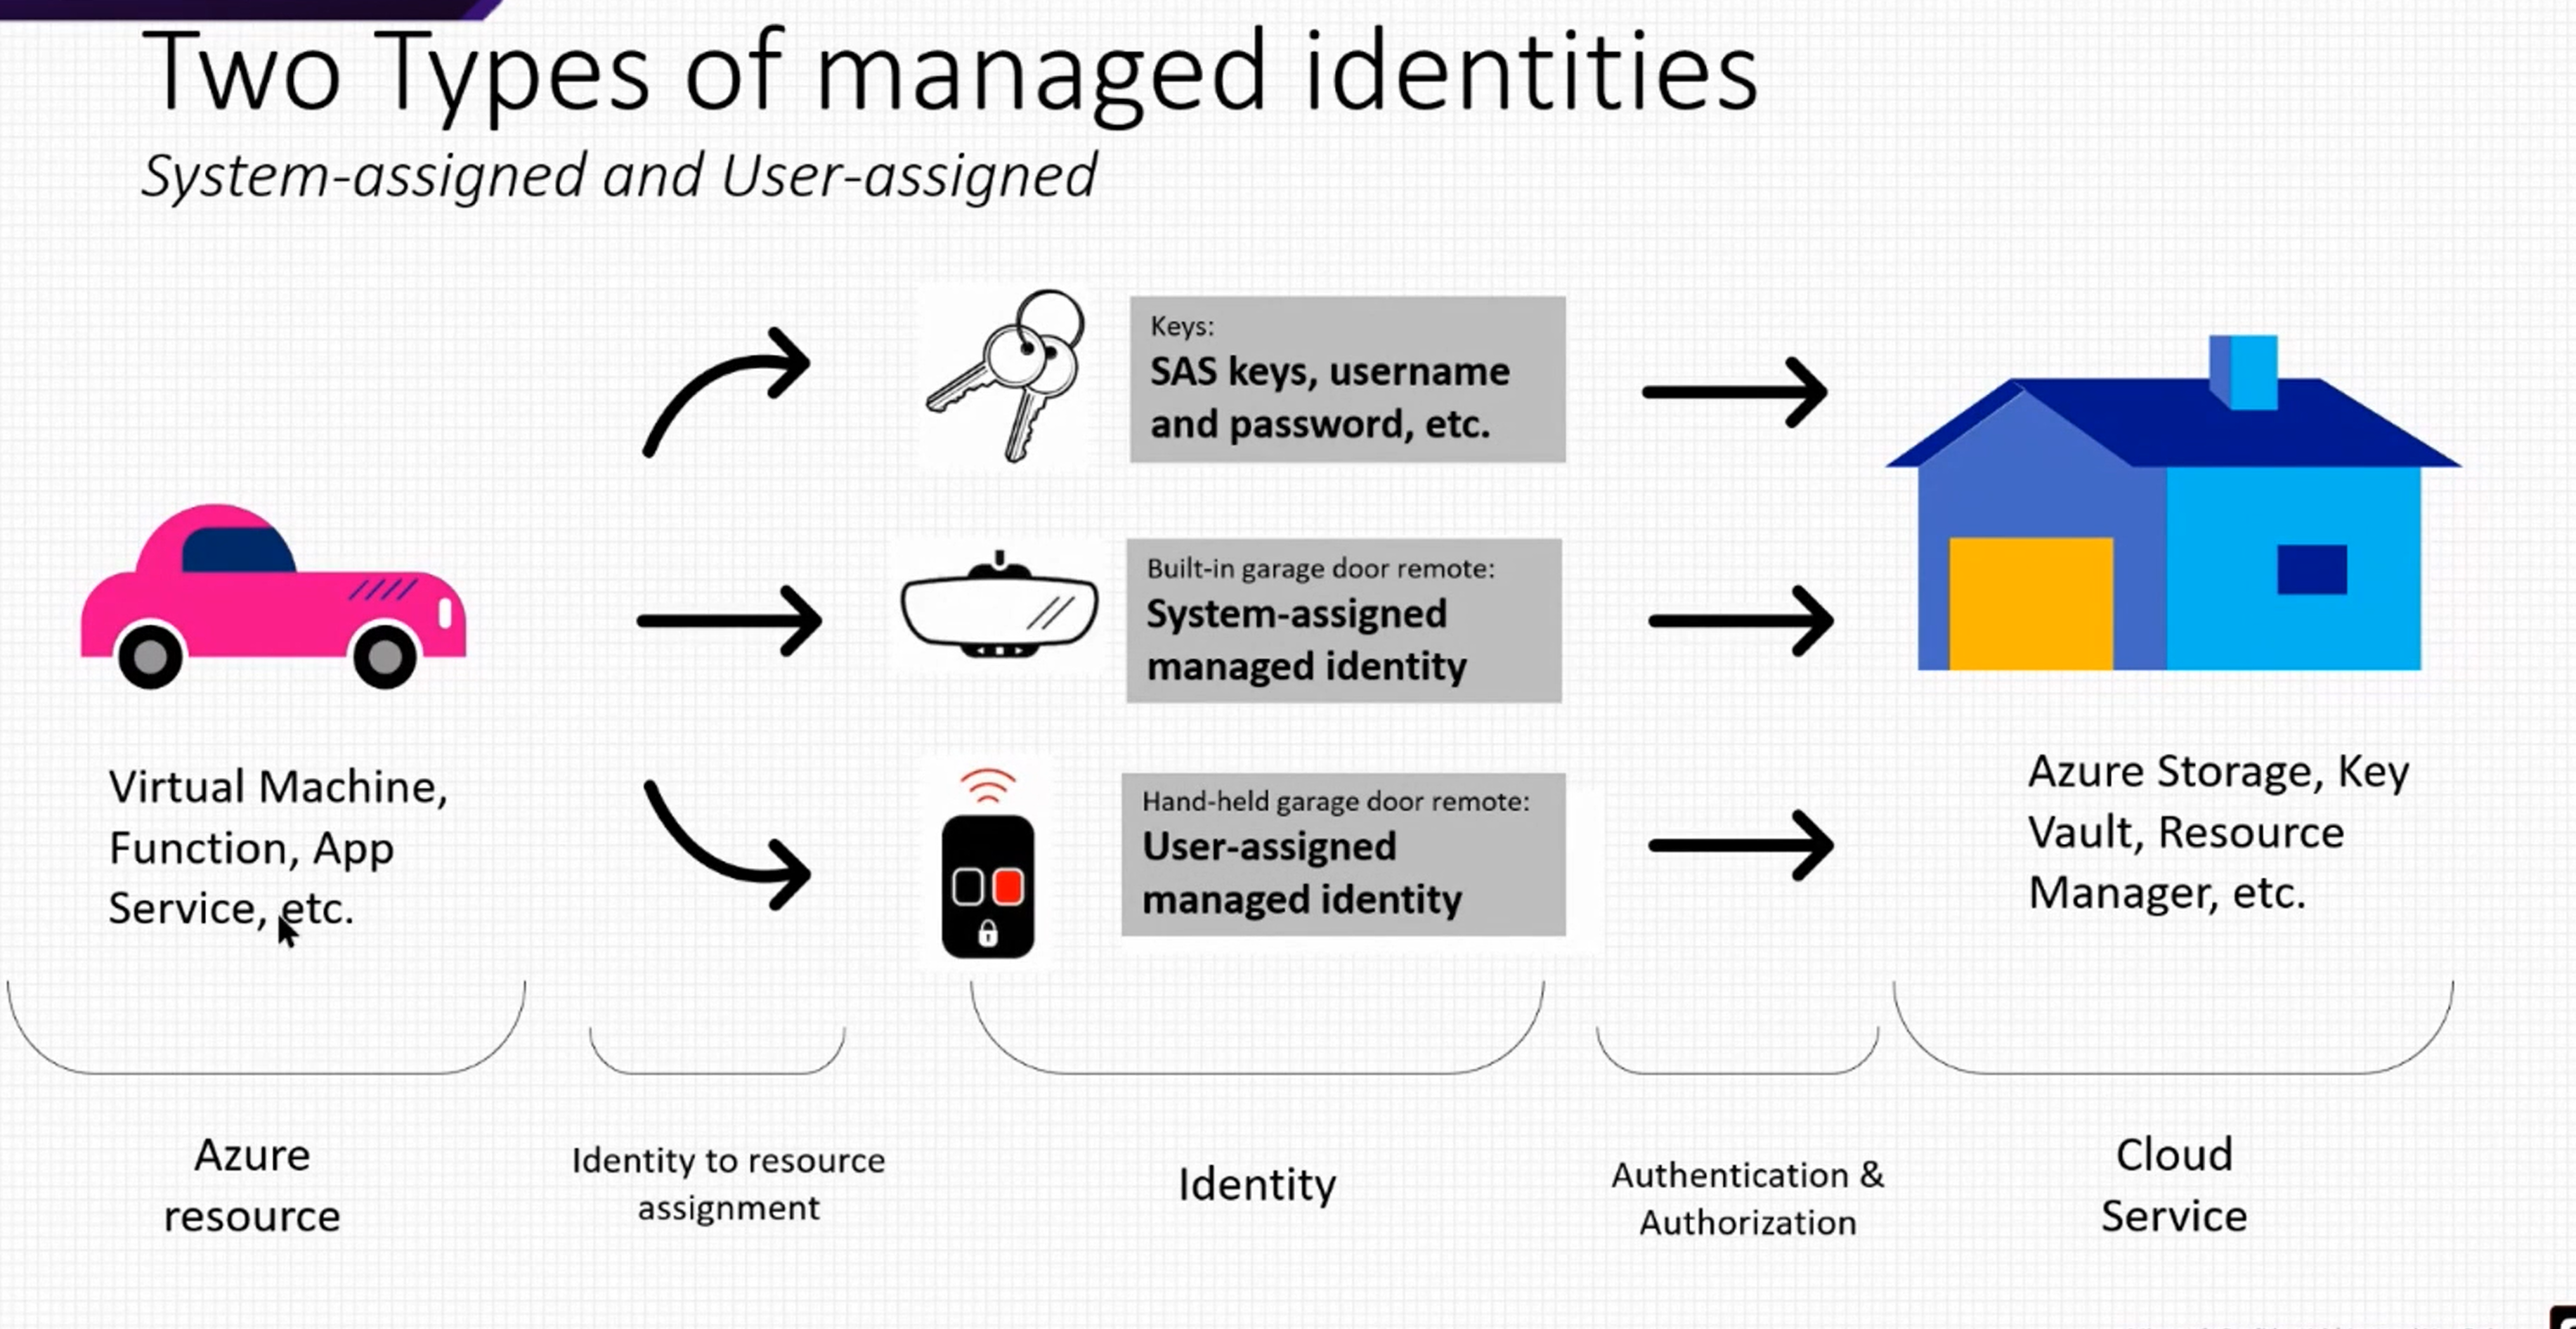
Your application requires service passwords, connection strings, and other secret configuration values to do its job. Storing and handling secret values is risky, and every usage introduces the possibility of leakage. Azure Key Vault, in combination with managed identities for Azure resources, enables your Azure web app to access secret configuration values easily and securely without needing to store any secrets in your source control or configuration.
Workflow
The idea of the exercise is to store the DB connection as a secret in a Key Vault Instance and reference it in the app using a unique secret URI. We will need to create a Key Vault with the database connection string stored as a secret and reference it as App service settings using key vault reference syntax.
For our example, I’m going to use the following repo https://github.com/dotnet-architecture/eShopOnWeb and deploy the PublicApi using Azure Web App. But first, let’s create the Azure Key Vault.
You can create a key vault using the Azure CLI:
1 | az keyvault create \ |
Then, add a secret to the key vault:
1 |
|
Let’s do a code change. Open your WebAPI project and add the following NuGet packages:
1 |
|
Then, open the Program.cs file and add the following code:

1 |
|

1 |
|
Now, we need to add the Key Vault URL to the app settings. Open the appsettings.json file and add the following code:
1 | { |
Let’s test locally

With this configuration done, we are good to deploy that webapp to Azure. The only configuration setting you need to add is the Key Vault URL. You can add it using the Azure CLI:
1 | az webapp config appsettings set \ |
After testing the app, you will see nothing works. So, you need to enable the managed identity. It can be easily done using the Azure CLI:
1 |
|
After creating it, get the principalId and with it, grant access to our keyvault:
1 | az keyvault set-policy \ |
Now, you can test the app again and it should work.
